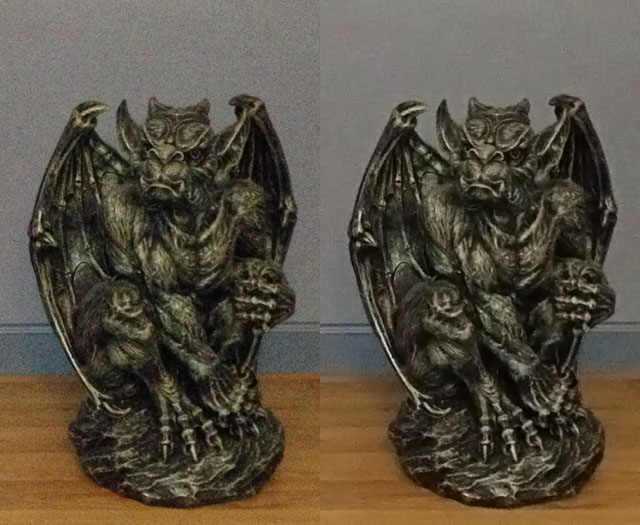
I use Adobe Photoshop for most of my photo manipulations. I am far from an expert and have just barely begun to scratch the surface, but I have learned a few things. A lot of my photos are taken with an iPhone in bad lighting conditions. I often have to spend some time working on the soft focus and poor lighting to get a photo that conveys what I want to convey. I know my photos will never win any sort of award, but if they can convey the idea I’m trying to get across, such as how big a tomato plant has gotten, I’m happy.
Smart Objects

Layer 0 has been converted to a Smart Object and I’ve applied the Reduce Noise filter twice.
I recommend trying Smart Objects if you never have. It’s a layer that is more than a layer. It contains the original pixels, plus any filters you have applied. You can at any point change the settings on any of those filters and regenerate the layer output without loosing quality.
To create a Smart Object, right click on the layer of interest and choose Convert to Smart Object. Now if you apply nearly any filter you’ll see it listed in the layer window. You can double click the name of the filter to bring up the settings for that filter and change them.
You’ll also notice to the right of the filter name is a little icon that looks like two sliders. If you double click that you can set a blending mode and opacity for that individual instance of the filter. To the left of the filter name is an eye. If you click the eye you can hide the effects of that filter. Clicking in the same spot will bring them back.
Soft Light
The Soft Light blending mode gives you an interesting ability to make some of the details of your images a little more bold. Duplicate the layer you are trying to enhance. Change the blending mode for the top one to Soft Light. Lower the opacity of that layer to 10 to 20%. Toggle that layer between visible and hidden to see the effect. Adjust the opacity as you see fit. If you want to reduce the details instead of making them more bold, invert this layer.
High Pass
The Soft Light effect mentioned above can be a little too much. Highlight that top layer and apply Filter -> Other -> High Pass. Set the opacity to 50% or so. Toggle that layer between visible and hidden to see the effect. Adjust the opacity as you see fit. If you want to reduce the details instead of making them more bold, invert this layer. Be aware that applying too strong a High Pass layer can make the edges of the objects in your image look odd. Look closely at the edges and make sure they look ok before saving your image.

The original image is on the left. I applied the Reduce Noise filter twice, duplicated the layer, switched the top layer blending mode to Soft Light, applied a High Pass filter, and set the opacity to 50% to yield the image on the right.